Showing posts with label diy. Show all posts

Saturday, February 7, 2015

No-Sew Ottoman Make-over

This summer I inherited a storage ottoman from my parents. Because you are never too old for free stuff from the 'rents. Ever. I loved everything about it. The size, craftsmanship, comfort level. Oh, except for one (huge) thing--I hated how it looked. The top had scratches from their cats, and even sans claw marks, the fabric, while great at the time of purchase, hadn't been in style for a dozen or more years.

For months, I covered it in blankets, and eventually draped it with a burlap coffee sack. That sack has now been promoted to a permanent piece of the furniture, with the help of scissors, a staple gun and hot glue.


For the bottom section, which I decided to cover in burlap, I sliced and diced a dark gray curtain I found....where else....in Ikea As-is, for $6.90. My technique, such as it is, was pretty much acting like I was about to wrap a giant, awkward Christmas present. Using staples. 
  • Dissassemble the ottoman, removing the lid and feet
  • Drape fabric over where you want to cover. Mark this with chalk, and allow a few extra inches on the top and bottom. Cut. 
  • Line the fabric with the top, and start stapling away. Be sure to keep the fabric taut as you go. 
  • When you come to corners, pulling the fabric tightly, tuck and fold the fabric in (again, like on a present). I did mine with a straight fold along each edge, but you could get fancy and go diagnonal. 
  • Process was similiar for the top, other than I cut the back of the bag open so it'd wrap around the top. Then flipped it over and started streching and stapling.
  • For the open end of the bag, I tried stich witch, but it wouldn't take, I'm guessing because the burlap is so thick. Brought in my trusty glue gun as the closer. 
It's the first time I've redone something bigger than a chair cushion. And if you look closely, that probably shows. But guess what? Nobody's doing that? And for $15 worth of upcycled material and a little effort, I have an ottoman that I adore. I'm sure it will wear off, but after months of staring at or disguising those ugly stripes, this new look stops in my tracks when I enter the family room. Or maybe that's the constant, faint aroma of coffee.


What Has Six Legs & a Bed?

Thanks to a little ingenuity mixed with desperation-- my Kivik sleeper couch with new, taller legs! 


As mentioned in an earlier post, this well designed sleeper sofa has one fatal flaw: Legs that barely come off the ground. And no threaded hole to screw in new, taller legs.


There really wasn't much out there on how to add taller legs to a Kivik couch. and none on adding them to the sleeper. (Make It-Love It has a great post on custom legs for the couch-only version.) Uncle Bob's Workshop is the only place I found offering Kivik legs that didn't require an adapter. Their prices are reasonable, starting at $11 + shipping, but I'd heard there was a long lead time.  

Lo and behold, a recent date night found us at...Ikea. (What? That is married date night. We grabbed dinner first.) I of course had to swing by the As-is section, where I found two pairs of Besta legs marked down to $2.00 each. While it's not 100% what I'd pictured, it's hard to argue with that price. Or fate. Which this seemed to be.

We checked in with an employee to find the best way to attach them. Turns out, Besta legs just screws right in, they don't sell brackets for it. Luckily, the gentleman we were talking to was no quitter. He went through his database and found mounting plates for a desk that he thought would work. Back in As-is, an employee sought out the parts (normally not sold separately) and sold us four for $.80. Say what you will about Ikea, I'm always impressed with their service! 

Back at home,we figured out a trick to make the legs flush to the bracket, rather than gapped: Remove the black  glide from the bottom, reach a flathead screw driver into the hold and give it a few twists to raise the leg up. It then just took a few screws per leg to attach the brackets to the sofa frame. Using this technique means you can just easily run to Home Depot, choose a leg you like, some brackets, and viola-- normal height couch!


About 45 minutes after we began the project, our couch had four 4.5" legs holding it aloft. However, the pesky bed was now resting on the floor, refusing to join the taller parts of the couch. Can you see how it droops and gaps? 

Which brings us back to the six legs. I returned to Ikea and purchased two more Besta legs. Sadly, at full price. For now, they are strategically wedged under the bed frame. A near-future project will be drilling into the metal to permanently attach them, with felt pads on the bottom so we can still slide into bed-mode as needed. In the meantime, we're pretty pleased with our six-legged couch. 


Friday, November 28, 2014

Tile Place Cards for Holiday Meal

Last tile post for the day. (Year? Lifetime?) Because we had a number of considerations to balance--young kids sitting near parents, keeping the "big kids" together, a guest who's health mandated little movement--we needed designated seating for Thanksgiving. It seemed easier, and smarter, than leaving it to chance and having to play musical chairs with 16 17 guests after the fact.

We pulled out the turkey hand-print ones from last year, but while we had the same amount of guests, some players had changed. Crossing out names seemed a little low brow, so we searched for something that would look nice and be done quickly. I came up with this:
We just took a sheet of tile leftover from the new backsplash, pulling the tiles off the mosiac and writing names in dry erase marker. The teens enjoyed re-naming each other's place cards; most of that is not fit for print. Then, after dinner, we wiped the names off and stored the tiles in case we need to do any repairs down the line.

You could instead pick up a sheet of tiles just for this purpose, maybe even mix and matching from ReStore to save $$ and support a good cause. I liked that we can use them again and that they serve a utilitarian purpose as well.


Tuesday, May 27, 2014

Claiming Lost Closet Corners

In theory, we have a large master bedroom closet. It is over 60 square feet. Unfortunately, that size takes the long way. It’s a little over 2 feet deep, stretching across 26 feet, the whole length of our room and the "short" wall of our bathroom. There are three points of access, each 4' wide. That means that means 10 feet of linear space is basically hidden behind walls. It's a no-man’s land, where clothes go to die.

Once something was hung in a wall area, it virtually disappeared. Plus, the ways the door slide, I could only see half of the “open” area at once. So, for instance, of the 80 inches of closet in the bathroom, I could only view 24" at a time. While my dream is to one day break through into the attic space behind the closet and build a to-die-for walk-in closet, I grudgingly have worked within the existing structure. With $21 worth of short shower tension rods, I regained 6 feet of closet space, turning those dark corners into useful space.


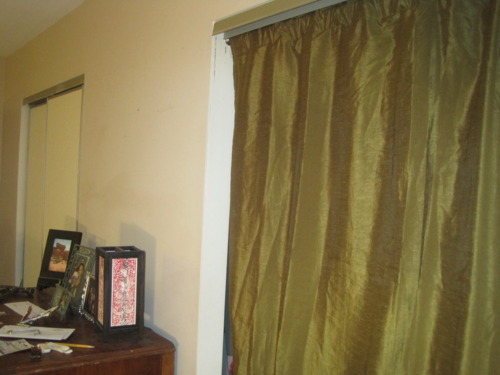
By installing the tension rods perpendicular to the existing closet bars, I can actually see and maneuver through everything tucked into the recesses. Next up is motion sensor lighting and replacing the doors with curtains--I used the green one as an experiment, but am on the prowl for something a little brighter. I'd take the tracks down and make the switch to French doors, but I'd rather put that money aside for my attic closet fund. After all, I'd hate for all that time I spent drooling over closet ideas on Pinterest to go to waste. #DreamBig :)

Thursday, October 3, 2013

New (Old) Stomping Grounds

I'm a bit of a blogging nomad. My first search for a blogging platform came 4 years ago as I sought a home for capturing everything that went into planning my wedding. I went through the various bridal website platforms, a few blogging sites and eventually landed here. Well, at the time, Blogspot: I Do To DIY.

Ah, those early days of domesication. Back when I heard that a marriage takes work, I thought it was meant in a 9-to-5, cushy desk job sort of way. Three years in and I'm a little wiser. Now I know it's roll up your sleeves, put on your hard hat and descend into the mine type of work. I mean, don't get me wrong. The pay is decent and the benefit package is pretty sweet, but...it's for real work.

And when the canary stops singing, it's not every man for himself, you have a family to dig out and bring back up with you. No wonder I'm exhausted all the time!

Or maybe that's because I stay up late blogging and watching HGTV. Yeah, that may have something to do with it too.

Wait. I digress. Marriage led to a new house, "our house," which led to "our" projects. Decks to build, gardens to start, furniture to find and refinish. Wanting to track the process, I wound up on Tumblr, but eventually wanted something more word friendly. A few rounds of Googling and here I am, back where I started. Thanks for having me back, Blogger!

Friday, September 6, 2013

Bullets to Bench (After)

I'm really happy with how the ammunition box upcycle went.  Here's the final product:

image

image

To get the height, we measured where other deck chairs fell and made my son pretend sit on it as we held it just to be sure (that part wasn't very scientific, but it was funny to watch).  After putting the legs on each side, we decided crossbars that connected the legs and cradled the box would add some extra support.  End result is a rustic look that I like, plus it serves double duty as storage and cost next to nothing:

  • Ammunition Box - $5 at yard sale
  • Spray Paint - $1 at ReStore (aka, best place on earth for scavengers)
  • Poly - $0 left by previous homeowner
  • Legs - $0 found wood as we cleaned the garage, prob from previous owner

So, under $10 for our new "custom" bench.  Plus, was nice bonding for the hubby & I.  The parts involving power tools were all him!  I'm the scavenger & idea person. :)  Ok, time to go test out the new bench.  Have to see if it can hold my weight along with a frosty Hoptober.  (Yikes, is it REALLY time for fall beers already???)

Saturday, June 15, 2013

Antique Vanity Turned Desk

After hours of stripping oil-based paint, sanding and painting, my vanity to desk make over is near complete--just waiting for the vintage wooden casters I ordered on ebay to arrive, so I can ditch the shims under the left legs.
Before (sitting in Citri-strip at this stage):
image
After--this shot is closer to the actual color, though in real life both shades are a little more turquoisey.
image
image
I mixed the color myself, using various hues left from other projects. he drawers are what the color looked like before I added more white. My only regret was adding Zinsser primer into the paint. It caused some clumping issues that made things take longer. Live and learn.
The top is just a slab of wood from another project. Will probably paint it a creamy white down the road, but for now, it does the trick. I figure this is plenty of progress for one weekend.

Wednesday, June 12, 2013

Stripping Moms: Prepping My "New" Desk

While it may not look like it yet, I just inherited the piece of furniture that will transform my home office. For awhile now I've wanted an old desk that I could rig as a computer desk and refinish. Then, this vanity fell into my lap.

My sister-in-law held on to it for years before giving up on refinishing it. I saw its "desk potential" and happily agreed to take it off her hands. This is how it looks with gobs of Citri-Strip coated on it:

image

With a lot of elbow grease from me and my crew (aka, my mom & MIL), the ugly green crackle coat is history. Can't wait until tomorrow when I can prime it. I'm hoping to complete the whole project over the weekend and have it moved into my office by Monday morning. Too bad half of the crew heads back to NC tomorrow.

image

Friday, April 12, 2013

Hoosier Mama? New Look to Vintage Piece

Finally! The hoosier that moved into our garage, patiently waiting for a face lift, before we moved into this house, now has it's rightful place in our kitchen:

image

My baking corner! And my wine corner. Given my lack of baking affinity, it is best to keep these close together. I almost gave up on those original  handles, they were caked with decades of kitchen grease and grime. I'm so glad I decided they were worth some elbow grease and TLC. 

image

image

So, why did it take SO long to put this cabinet in its rightful place? One, the garage was a disaster zone long after we'd settled into the rest of the house. I simply couldn't get to the hoosier to start my project.

Two, it involved more than a coat of paint. Originally, the doors had a center panel that had a PA dutch style tulip stencil. But not in a good way. There was also scalloped edging under the cabinet doors, way to country kitchen for me. Here's some pics between before and after (I neglected to take pics early on):

image

image

Luckily, organizing the garage motivated my husband to bust out his tools, so he happily jigsawed off the unwanted elements of the hoosier. From there, all it needed was primer, chicken wire, custom paint (me mixing random colors in an old yogurt container), a staple gun, shelf liner...ok, a lot went into this. And we are so happy with the end result!   Extra storage, a vintage meets modern feel and a piece that we can both look at as a labor of love. It's amazing what we can accomplish in a year and a half when we work as a team. ;-)  image