Showing posts with label storage. Show all posts

Saturday, February 7, 2015

No-Sew Ottoman Make-over

This summer I inherited a storage ottoman from my parents. Because you are never too old for free stuff from the 'rents. Ever. I loved everything about it. The size, craftsmanship, comfort level. Oh, except for one (huge) thing--I hated how it looked. The top had scratches from their cats, and even sans claw marks, the fabric, while great at the time of purchase, hadn't been in style for a dozen or more years.

For months, I covered it in blankets, and eventually draped it with a burlap coffee sack. That sack has now been promoted to a permanent piece of the furniture, with the help of scissors, a staple gun and hot glue.


For the bottom section, which I decided to cover in burlap, I sliced and diced a dark gray curtain I found....where else....in Ikea As-is, for $6.90. My technique, such as it is, was pretty much acting like I was about to wrap a giant, awkward Christmas present. Using staples. 
  • Dissassemble the ottoman, removing the lid and feet
  • Drape fabric over where you want to cover. Mark this with chalk, and allow a few extra inches on the top and bottom. Cut. 
  • Line the fabric with the top, and start stapling away. Be sure to keep the fabric taut as you go. 
  • When you come to corners, pulling the fabric tightly, tuck and fold the fabric in (again, like on a present). I did mine with a straight fold along each edge, but you could get fancy and go diagnonal. 
  • Process was similiar for the top, other than I cut the back of the bag open so it'd wrap around the top. Then flipped it over and started streching and stapling.
  • For the open end of the bag, I tried stich witch, but it wouldn't take, I'm guessing because the burlap is so thick. Brought in my trusty glue gun as the closer. 
It's the first time I've redone something bigger than a chair cushion. And if you look closely, that probably shows. But guess what? Nobody's doing that? And for $15 worth of upcycled material and a little effort, I have an ottoman that I adore. I'm sure it will wear off, but after months of staring at or disguising those ugly stripes, this new look stops in my tracks when I enter the family room. Or maybe that's the constant, faint aroma of coffee.




Tuesday, May 27, 2014

Claiming Lost Closet Corners

In theory, we have a large master bedroom closet. It is over 60 square feet. Unfortunately, that size takes the long way. It’s a little over 2 feet deep, stretching across 26 feet, the whole length of our room and the "short" wall of our bathroom. There are three points of access, each 4' wide. That means that means 10 feet of linear space is basically hidden behind walls. It's a no-man’s land, where clothes go to die.

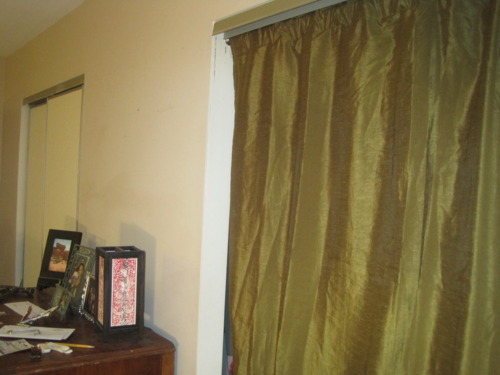
Once something was hung in a wall area, it virtually disappeared. Plus, the ways the door slide, I could only see half of the “open” area at once. So, for instance, of the 80 inches of closet in the bathroom, I could only view 24" at a time. While my dream is to one day break through into the attic space behind the closet and build a to-die-for walk-in closet, I grudgingly have worked within the existing structure. With $21 worth of short shower tension rods, I regained 6 feet of closet space, turning those dark corners into useful space.


By installing the tension rods perpendicular to the existing closet bars, I can actually see and maneuver through everything tucked into the recesses. Next up is motion sensor lighting and replacing the doors with curtains--I used the green one as an experiment, but am on the prowl for something a little brighter. I'd take the tracks down and make the switch to French doors, but I'd rather put that money aside for my attic closet fund. After all, I'd hate for all that time I spent drooling over closet ideas on Pinterest to go to waste. #DreamBig :)

Friday, April 12, 2013

Hoosier Mama? New Look to Vintage Piece

Finally! The hoosier that moved into our garage, patiently waiting for a face lift, before we moved into this house, now has it's rightful place in our kitchen:

image

My baking corner! And my wine corner. Given my lack of baking affinity, it is best to keep these close together. I almost gave up on those original  handles, they were caked with decades of kitchen grease and grime. I'm so glad I decided they were worth some elbow grease and TLC. 

image

image

So, why did it take SO long to put this cabinet in its rightful place? One, the garage was a disaster zone long after we'd settled into the rest of the house. I simply couldn't get to the hoosier to start my project.

Two, it involved more than a coat of paint. Originally, the doors had a center panel that had a PA dutch style tulip stencil. But not in a good way. There was also scalloped edging under the cabinet doors, way to country kitchen for me. Here's some pics between before and after (I neglected to take pics early on):

image

image

Luckily, organizing the garage motivated my husband to bust out his tools, so he happily jigsawed off the unwanted elements of the hoosier. From there, all it needed was primer, chicken wire, custom paint (me mixing random colors in an old yogurt container), a staple gun, shelf liner...ok, a lot went into this. And we are so happy with the end result!   Extra storage, a vintage meets modern feel and a piece that we can both look at as a labor of love. It's amazing what we can accomplish in a year and a half when we work as a team. ;-)  image
