Saturday, June 15, 2013

Antique Vanity Turned Desk

After hours of stripping oil-based paint, sanding and painting, my vanity to desk make over is near complete--just waiting for the vintage wooden casters I ordered on ebay to arrive, so I can ditch the shims under the left legs.
Before (sitting in Citri-strip at this stage):
image
After--this shot is closer to the actual color, though in real life both shades are a little more turquoisey.
image
image
I mixed the color myself, using various hues left from other projects. he drawers are what the color looked like before I added more white. My only regret was adding Zinsser primer into the paint. It caused some clumping issues that made things take longer. Live and learn.
The top is just a slab of wood from another project. Will probably paint it a creamy white down the road, but for now, it does the trick. I figure this is plenty of progress for one weekend.

Wednesday, June 12, 2013

Stripping Moms: Prepping My "New" Desk

While it may not look like it yet, I just inherited the piece of furniture that will transform my home office. For awhile now I've wanted an old desk that I could rig as a computer desk and refinish. Then, this vanity fell into my lap.

My sister-in-law held on to it for years before giving up on refinishing it. I saw its "desk potential" and happily agreed to take it off her hands. This is how it looks with gobs of Citri-Strip coated on it:

image

With a lot of elbow grease from me and my crew (aka, my mom & MIL), the ugly green crackle coat is history. Can't wait until tomorrow when I can prime it. I'm hoping to complete the whole project over the weekend and have it moved into my office by Monday morning. Too bad half of the crew heads back to NC tomorrow.

image

Monday, June 3, 2013

Dirt+Rocks+Sweat = Patio

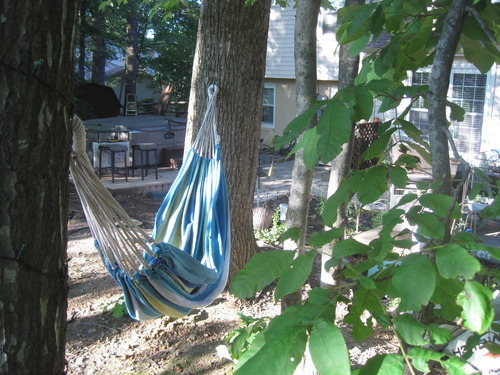
One of my last big yard projects for the season is now off the to-do list! 30 bags of crushed gravel, 86 pavers, 12 bags + 2 wheelbarrows of rocks and a converted fire pit planter later, we now have an attractive rock garden/patio area next to the hot tub instead of a pile of muddy gook. Ok, to count the new patio area as done, I'm cheating and considering adding lattice with climbing flowers to cover up the hose & mechanical area as a separate project! So, ignoring that part...here's some after pics:

image

image

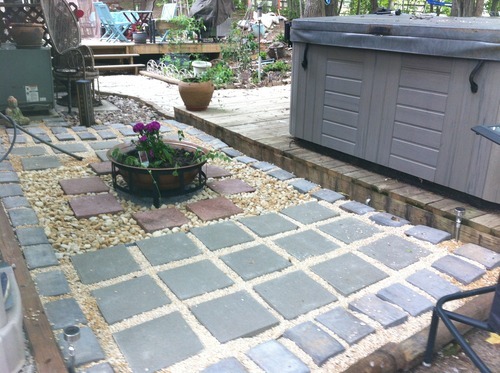
The rocks leading into the area were either painstakingly collected from around our yard (attacking ants be damned!) or were gathered during my cross country trips--aka, the pretty rocks.image

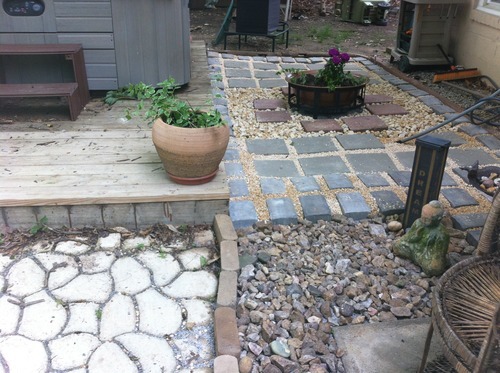
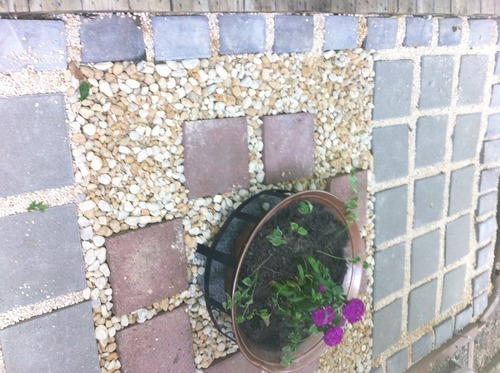
Used pea gravel in between the outer pavers and river rocks in the center. Underneath it all is crushed gravel. The center planter is an upcycled fire pit. Painted with hammered copper spray paint to pretty it up and drilled a few holes to prevent it from becoming a swampy mosquito incubator.

image

image

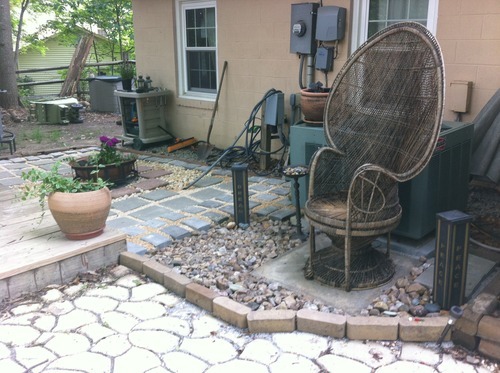
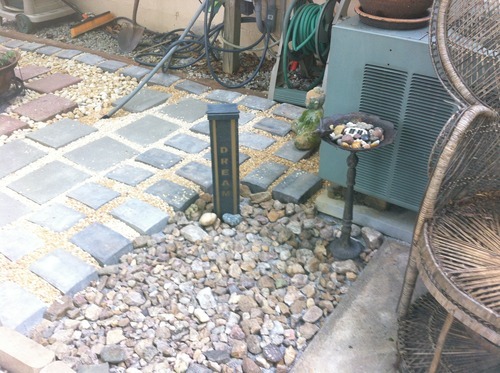
The wicker chair has since become a fun aubergine. Will post updated pics AFTER I get the lattice over that mess of wires and hose. As you can see, we also need a longer whip (that big, ugly gray thing smack dab in the middle of the patio) for the hot tub so we can bury the line. The contractor who moved it for us unfortunately wasn't super good at finishing up HIS to do list. But, still SO much better than where we started from, I can definitely live with this stage of progress for the time being.

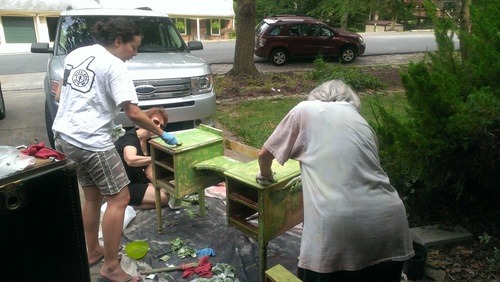
We've come a long way from having one lonely hot tub platform on the hill surrounded by dirt, and it's been fun watching the backyard slowly transform into a sanctuary bit by bit. Not be cliche, but feel like we appreciate it much more since our sweat (& the occasional blood and tears) are part of each improvement. 

image