Wednesday, May 28, 2014

Tear Down The Wall...Kitchen Deconstructed

Once upon a time, our house was all about boundaries. Walls separating the living room from the dining room and kitchen. Built in pantries that blocked doorways when opened: 


After a few years of being separated from guests while I slaved away in the kitchen, I went all Pink Floyd on our house. It was time to TEAR DOWN THE WALL. With the help of some pros, due to a pesky load bearing beam


 I'm not sure if I should admit this, but the first night that the wall came down, I poured a glass of wine, sat on a the couch, and just stared in admiration. For like 30 minutes. On a Friday. Opening up our kitchen instantly transformed the entire first floor.

While we lived in a state of destruction and construction for about a month, and the dining room doubled as a pantry for most of that time, the renovation was planned in such a way that we never spent more than a few days without being able to use the bulk of our kitchen. Having all our appliances before it began probably helped.

Was I scared to change the architecture of our home? Absolutely. I went in circles worrying if I we might be ruining our property value, or if we'd regret removing what also served as a sound barrier. However, from the moment that light from the living and dining rooms first flooded into the kitchen, I've had no regrets. The space, and the people using it, are connected just liked we'd hoped. My advice about walls between where you cook and where you live--when in doubt, take it out.


Ikea Cabinets: A Sea of Boxes

It's one thing to hear that your Ikea kitchen will come in a million different pieces that need to be puzzled together. It's another to come home to delivery men turning your garage into a warehouse:


This picture is taken AFTER we'd pulled a number of boxes into the house to start assembly. It's overwhelming to say the least. Not to mention, it's recommended that you check each box against your order to make sure everything came as it should. This goes much faster as a two man job. Coffee doesn't hurt either.

When ordering Ikea or any RTA cabinets, be sure to clear space for the flood of cardboard coming your way. Preferably, this will include some horizontal space so that you can get to what you need without risking life and limb under a tower of cabinetry.

However, this sea of boxes is not as overwhelming as it initally seems. Each box is clearly marked with product numbers and dimensions. Just keep the inventory list handy to "decode" as you get into putting it all together. Plus, there's a certain satisfaction watching the pile get whittled away each day. Although you may not be very popular with your waste removal service on recycling day.

Tuesday, May 27, 2014

Claiming Lost Closet Corners

In theory, we have a large master bedroom closet. It is over 60 square feet. Unfortunately, that size takes the long way. It’s a little over 2 feet deep, stretching across 26 feet, the whole length of our room and the "short" wall of our bathroom. There are three points of access, each 4' wide. That means that means 10 feet of linear space is basically hidden behind walls. It's a no-man’s land, where clothes go to die.

Once something was hung in a wall area, it virtually disappeared. Plus, the ways the door slide, I could only see half of the “open” area at once. So, for instance, of the 80 inches of closet in the bathroom, I could only view 24" at a time. While my dream is to one day break through into the attic space behind the closet and build a to-die-for walk-in closet, I grudgingly have worked within the existing structure. With $21 worth of short shower tension rods, I regained 6 feet of closet space, turning those dark corners into useful space.


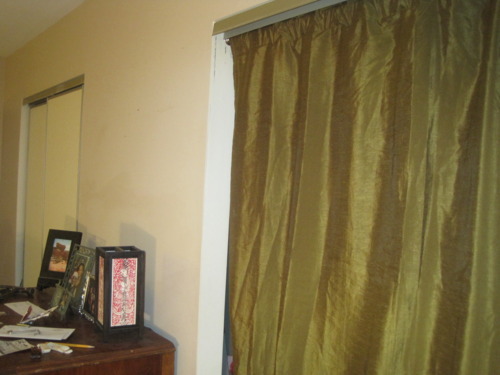
By installing the tension rods perpendicular to the existing closet bars, I can actually see and maneuver through everything tucked into the recesses. Next up is motion sensor lighting and replacing the doors with curtains--I used the green one as an experiment, but am on the prowl for something a little brighter. I'd take the tracks down and make the switch to French doors, but I'd rather put that money aside for my attic closet fund. After all, I'd hate for all that time I spent drooling over closet ideas on Pinterest to go to waste. #DreamBig :)

Sunday, May 4, 2014

Pallet Sectional - Final Look, Cost

Ta-dah! Here's the final set up for our pallet sectional. (The project was prompted when a snow storm took out our old deck furniture.) I love that the new set up can seat a bunch of guests for dining or make a cozy place to nap away a lazy afternoon. Below is the cost and material breakdown.
Pallet sectional outdoor


  • 8-wood pallets, 36"x48" each - $0
  • 6 - posts used for backs; scrap pieces from Lowe's - $0
  • 2-Beddinge futon mattresses, 55"x79" each (mattress 4" high, seat depth 31"), included covers - $35, CL
  • 2-vinyl zipped mattress protectors, queen size - $25
  • 1-32 oz 303 Products 30650 High Tech Fabric Guard w/ Water Repellant - $25.75 (paid $3.99 extra for 1-day ship) 
  • 8 - Ullkatus Cushions/Pillows from Ikea, green - $32 (sold in outdoor section, presumably meant for outdoor use)
  • 6 - Gulort cushion/pillows from Ikea - $18 (on clearance, believe they are being discontinued; treated w/ waterproofing spray)
  • Total Cost: $135.75

Sets with similiar seating capability run in the range of $1,500-2,500. So I'm feeling good about our final costs. Plus, we went big. If you were doing, say, a loveseat, you could spend much less.

Other cushion ideas include crib or foam mattresses or old couch cushions. You could even look for actual outdoor cushions at Big Lots or end-of-season sales. I hear some people do that; use things for their intended purposes. :) I wouldn't know anything about that, though. I do know that I'm really happy basically having two beds on my deck. So is our dog Buddha.